

UPLOAD HELP
This page contains important information regarding best practices and troubleshooting related to File Upload Requests, and use of Aspera Connect for upload of assets to UMG Video Services. Please share with your file uploader to assist with timely and spec compliant asset deliveries.
File Upload Request
Overview
Videos and any supporting files are uploaded using the File Upload Request page. A custom File Request link is generated for each submission.
- The File Request link will remain active for 120 days to facilitate resubmissions.
- Uploads made via the File Request should leverage ASPERA whenever possible.
The following video is an in-depth walk through on how to upload files via the File Upload Request page, including best practices for uploading assets to Video Services.
Share URL: https://lnk.to/umg-video-services-file-upload-request
REQUESTED METADATA
Information must be entered for each file that will be uploaded. Select the SHOW METADATA link next to each file name or the Expand All option above the list of selected files to view the requested metadata fields.
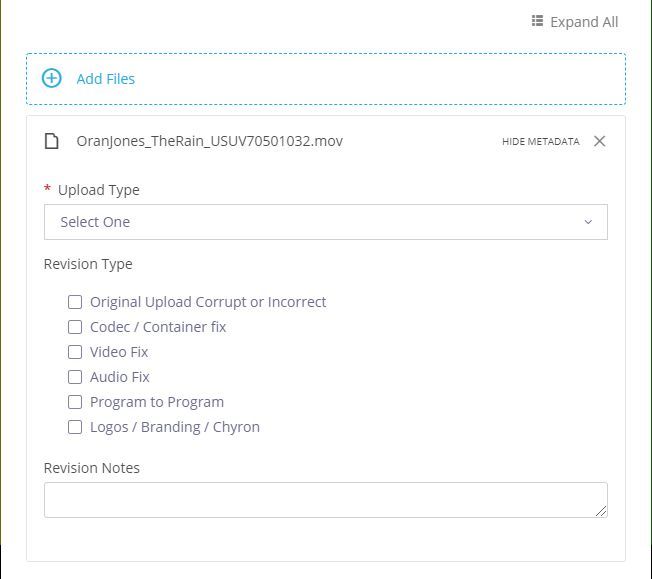
Upload Type
- Selection is required to indicate whether the file to be uploaded is the Original version or a Revision to a previously uploaded file.
Revision Type
- Selection of one or more items is requested to provide the reason that a revised file is being uploaded and to identify the modifications that have been made since the prior version.
| REVISION TYPE | REASON FOR USE |
|---|---|
| Original Upload Corrupt or Incorrect | The revised file corrects an issue preventing QC to be done on the original file, or replaces an incorrect original file. |
| Codec / Container fix | The revised file addresses use of an unsupported codec or container with the previously submitted file. |
| Video Fix | The revised file corrects a video issue within the file. |
| Audio Fix | The revised file corrects an audio issue within the file. |
| Program to Program | The revised file has been reformatted with a “P2P” assembly. |
| Logos / Branding / Chyron | The revised file modifies or removes bugs, chyrons, hashtags, brand callouts, etc. |
ASPERA CONNECT
OVERVIEW
The following is a summary of best practices that users should follow when uploading assets via File Request using Aspera Connect. Please watch the full File Upload Requests video above for all of the relevant info.
GENERAL
- Users should always use Aspera to upload assets to Video Services using the instructions provided in the File Upload Request help video above.
- All Aspera users should follow the prompts from their web browser to install the Aspera Connect browser plugin and desktop application.
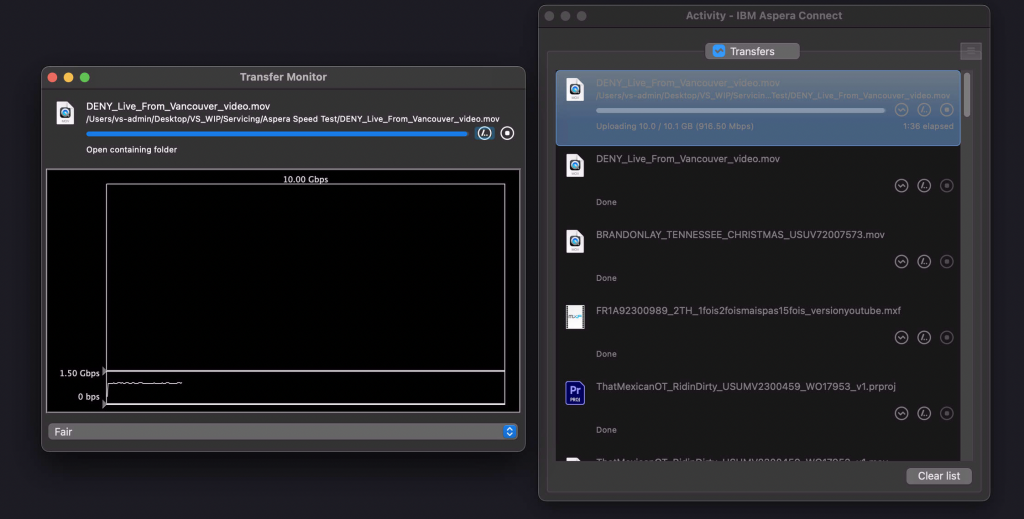
TARGET TRANSFER RATE
- To achieve the fastest upload speeds possible for a given user, it’s recommended that users set the maximum transfer rate as close as possible to the highest bandwidth available on the host machine.
- If working on shared network, consult your IT staff on recommended bandwidth settings.
How to Find the Setting:
- With Aspera Connect open, open the Activity window, and select the icon to open the Transfer Monitor window for the applicable transfer.
- Adjust the Target Transfer rate by moving the arrow pointer to the desired rate.
MAX CONCURRENT TRANSFERS AND RETRIES
- It is highly recommended that users set “Maximum Concurrent Transfers” to “1”. Enabling multiple concurrent transfers will result in the splitting up of the available bandwidth across multiple uploads, and potentially slow down time sensitive uploads of single assets.
- If a user’s internet connectivity is being continuously interrupted, user may elect to increase the number of automatic retries when uploads fail. The default number of retries is 3.
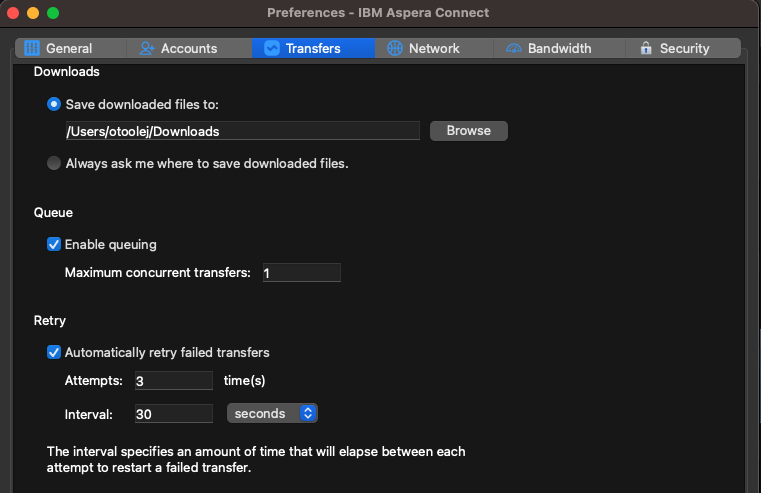
How to Find the Setting:
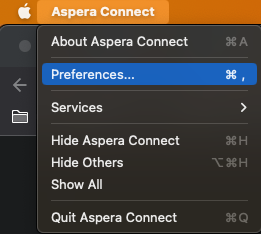
Mac:
1. With Aspera Connect open, navigate to your Mac’s top menu bar, select Aspera Connect and then Preferences.
2. Select the “Transfers” tab in the Preferences window.

Windows:
1. Navigate to your Task Bar and select the ^ icon to “Show Hidden Icons”.
2. Right click the Aspera icon, and select “Preferences”.
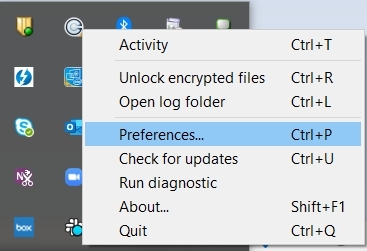
3. Select the “Transfers” tab in the Preferences window.